LinearLayoutの使い方
こんにちは。アスネット開発部の名倉です。 今回はAndroidアプリの画面を作成するためのレイアウトの中から、LinearLayoutについてご紹介します。
LinearLayoutとは
LinearLayoutは子要素を縦一列、もしくは横一列に並べて配置するレイアウトです。
子要素を縦配置するには
LinearLayoutの属性 android:orientation="vertical" を設定します。これだけです。
子要素を横配置するには
LinearLayoutの属性 android:orientation="horizontal" を設定します。こちらもこれだけです。
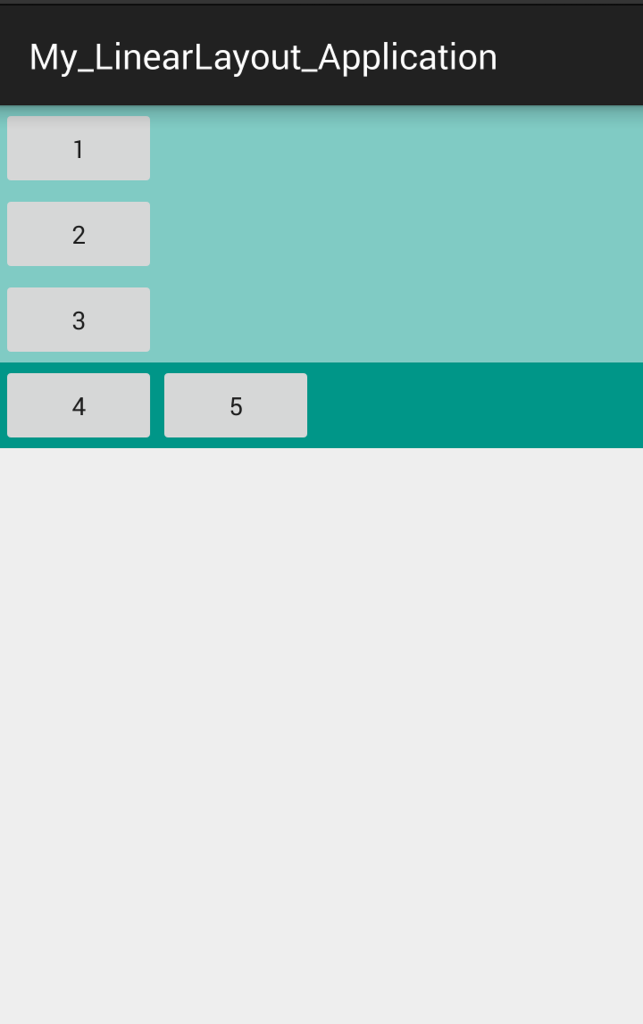
縦配置のレイアウト、横配置のレイアウトにボタンを配置して表示させてみます。
<LinearLayout xmlns:android="http://schemas.android.com/apk/res/android"
    android:layout_width="match_parent"
    android:layout_height="match_parent"
    android:orientation="vertical">

    <LinearLayout
        android:layout_width="match_parent"
        android:layout_height="wrap_content"
        android:background="@color/accent_material_dark"
        android:orientation="vertical">

        <Button
            android:layout_width="wrap_content"
            android:layout_height="wrap_content"
            android:text="1"/>

        <Button
            android:layout_width="wrap_content"
            android:layout_height="wrap_content"
            android:text="2"/>

        <Button
            android:layout_width="wrap_content"
            android:layout_height="wrap_content"
            android:text="3"/>

    </LinearLayout>

    <LinearLayout
        android:layout_width="match_parent"
        android:layout_height="wrap_content"
        android:background="@color/accent_material_light"
        android:orientation="horizontal">

        <Button
            android:layout_width="wrap_content"
            android:layout_height="wrap_content"
            android:text="4"/>
        <Button
            android:layout_width="wrap_content"
            android:layout_height="wrap_content"
            android:text="5"/>

    </LinearLayout>

</LinearLayout>
表示結果はこのようになります。 ※それぞれのLinearLayoutには背景色をつけています。

位置決め
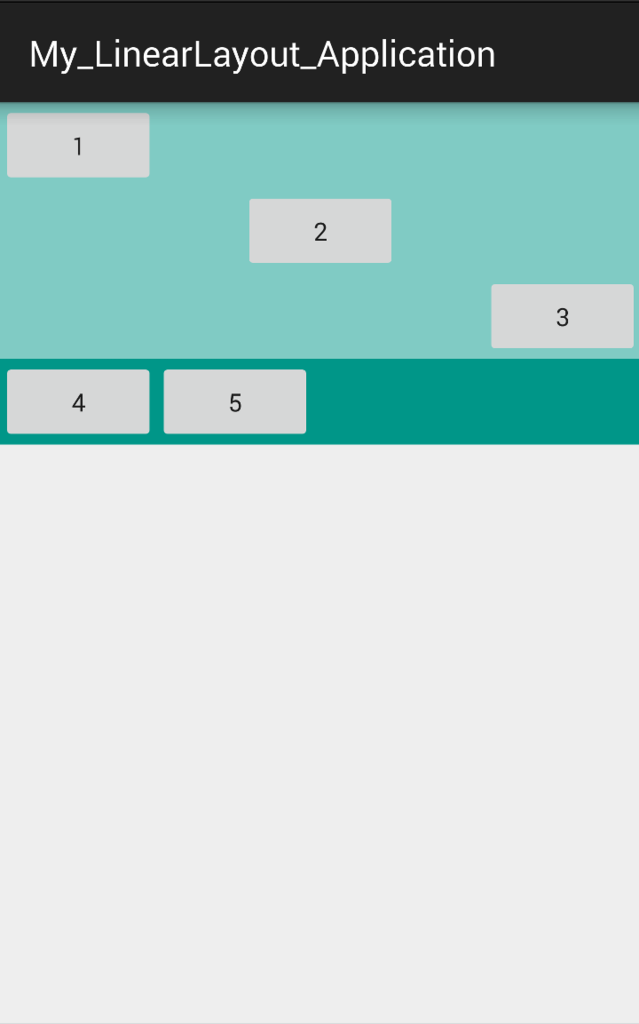
LinearLayoutに子要素を配置するとデフォルトで左寄せになってしまいますが、 android:layout_gravity="(表示位置 left/center/rightなど)" を設定することで表示位置を変更することが出来ます。 "|"で区切ることで組み合わせて使うことも可能です。(例:"top|right")
先ほどのサンプルに設定してみます。
<LinearLayout xmlns:android="http://schemas.android.com/apk/res/android"
    android:layout_width="match_parent"
    android:layout_height="match_parent"
    android:orientation="vertical">

    <LinearLayout
        android:layout_width="match_parent"
        android:layout_height="wrap_content"
        android:background="@color/accent_material_dark"
        android:orientation="vertical">

        <Button
            android:layout_width="wrap_content"
            android:layout_height="wrap_content"
            android:layout_gravity="left"
            android:text="1"/>
        <Button
            android:layout_width="wrap_content"
            android:layout_height="wrap_content"
            android:layout_gravity="center"
            android:text="2"/>
        <Button
            android:layout_width="wrap_content"
            android:layout_height="wrap_content"
            android:layout_gravity="right"
            android:text="3"/>

    </LinearLayout>

    <LinearLayout
        android:layout_width="match_parent"
        android:layout_height="wrap_content"
        android:background="@color/accent_material_light"
        android:orientation="horizontal">

        <Button
            android:layout_width="wrap_content"
            android:layout_height="wrap_content"
            android:text="4"/>
        <Button
            android:layout_width="wrap_content"
            android:layout_height="wrap_content"
            android:text="5"/>

    </LinearLayout>

</LinearLayout>
表示してみます。

重みづけ
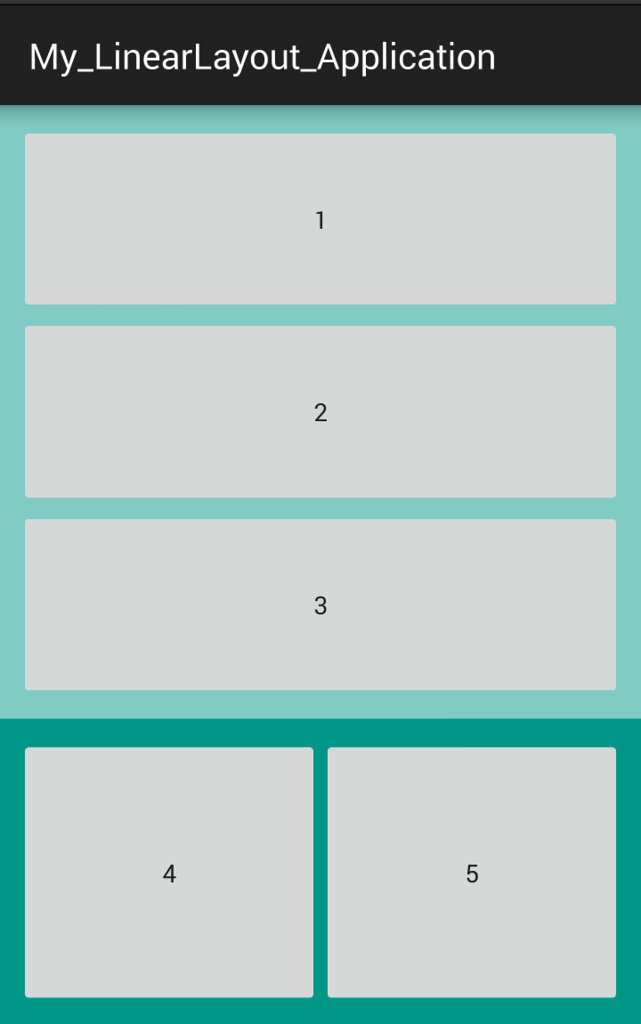
LinearLayoutでは、子要素に重みをつけることが出来ます。 方法は、子要素に android:layout_weight="(数値)" を設定します。 また、重みづけする子要素はサイズ指定を0dpに設定します。 android:orientation="vertical"の子要素であればandroid:layout_height="0dp" android:orientation="horizontal"の子要素であればandroid:layout_width="0dp"
サイズを0dp以外に指定すると、そのサイズを先に確保してしまうので気を付けましょう。 先ほどのサンプルに重みづけを行いました。 ※比率を見やすくするためandroid:paddingも追加しています。
<LinearLayout xmlns:android="http://schemas.android.com/apk/res/android"
    android:layout_width="match_parent"
    android:layout_height="match_parent"
    android:orientation="vertical">

    <LinearLayout
        android:layout_width="match_parent"
        android:layout_height="0dp"
        android:padding="10dp"
        android:orientation="vertical"
        android:background="@color/accent_material_dark"
        android:layout_weight="2">

        <Button
            android:layout_width="match_parent"
            android:layout_height="0dp"
            android:text="1"
            android:layout_weight="1"/>
        <Button
            android:layout_width="match_parent"
            android:layout_height="0dp"
            android:text="2"
            android:layout_weight="1"/>
        <Button
            android:layout_width="match_parent"
            android:layout_height="0dp"
            android:text="3"
            android:layout_weight="1"/>

    </LinearLayout>

    <LinearLayout
        android:layout_width="match_parent"
        android:layout_height="0dp"
        android:padding="10dp"
        android:orientation="horizontal"
        android:background="@color/accent_material_light"
        android:layout_weight="1">

        <Button
            android:layout_width="0dp"
            android:layout_height="match_parent"
            android:text="4"
            android:layout_weight="1"/>
        <Button
            android:layout_width="0dp"
            android:layout_height="match_parent"
            android:text="5"
            android:layout_weight="1"/>

    </LinearLayout>

</LinearLayout>
上下のレイアウトを2:1の割合で重みづけ、 それぞれの子要素は等比率(全て1)で重みづけしています。 表示するとこんな具合です。

終わりに
いかがでしたでしょうか? 今回は開発者としては初歩的な内容でしたが、これだけでも分かると画面表示のバリエーションが広がります。 基礎固めの参考にでもしていただければと思います。
参考URL
今回は重みづけを0dpで行うようにしましたが、wrap_contentを使ったやり方もあります。
Androidアプリ開発入門 リニアレイアウト (LinearLayout) の子の部品の配置 (重み付け) http://androidguide.nomaki.jp/html/layout/linearlayout/weight.html